Dessert Recipes

Yuzu Yumminess In A Jar

In my humble opinion homemade presents are the best. Nothing like receiving a gift and knowing that someone cared about you enough to put all that effort in! Not that Christmas shopping in insane malls doesn’t count as effort of course. I would consider that as more of a sacrifice, a sacrifice of sanity because malls these days are nuts.  Even malls in Japan make feel like I’m going into battle and Christmas isn’t even a recognized holiday here! So DIY gifts are the perfect solution, at least for me, not only do I get to avoid traumatic malls, I get to shower the people I care most about with gifts that took lots of time and effort to make.

I know I probably shouldn’t give away all my Christmas DIY present secrets away for fear someday my friends and I will accidentally both make the same gifts, but this one is just too delicious not to share. Plus, it’s not my own recipe so I shouldn’t be greedy with it.

For those of you who know me, it isn’t a big secret, I adore yuzu. Yuzu are a Japanese citrus that are similar to both an orange and a lemon. I love their scent, their taste, even their shape! The ease with which I can buy yuzu in Japan is something I will definitely miss a lot when I go back to Canada. Thank heavens for Southeast Asian import stores! This is my favourite yuzu jam recipe, and what I love about this jam is that it’s great on toast and you can even put it in your tea! Toast and tea, genius. I probably should have named my blog that, two things I adore and an alliteration…

Anyhoo onto the actual recipe. I apologize in advance for the terrible iPhone photos!

What you’ll need:

  • 5 medium sized yuzu (about 500 grams)
  • pure water 500mL + 300mL
  • 500 grams granulated sugar

Directions:

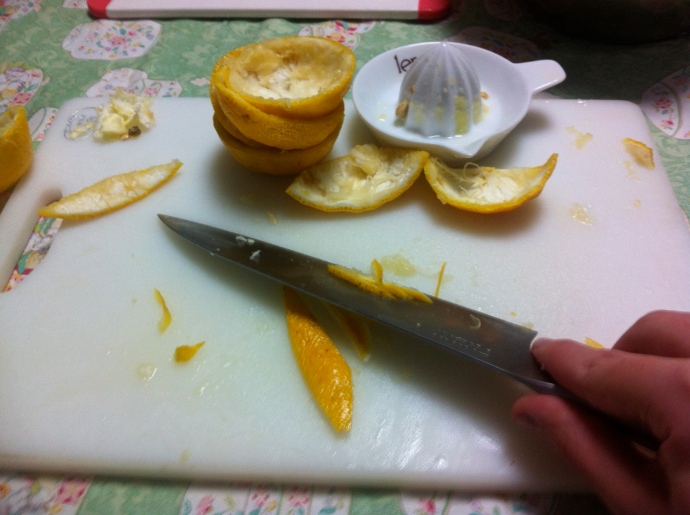
  1. Wash the yuzu. Cut in half and squeeze out juice into a small bowl.
  2. Cut peel into smaller pieces (I personally prefer 1/8 wedges for my size). As best as you can strip the yuzu peels of their pulp. Place all pulp and seeds into a small pot.
  3. Fill a large bowl with icy water. Next, cut all of the yuzu peels into very thin strips, the thinner the better. Place these yuzu peel strips into the icy water. By doing this the yuzu peel becomes less bitter.IMG_3374 IMG_3377
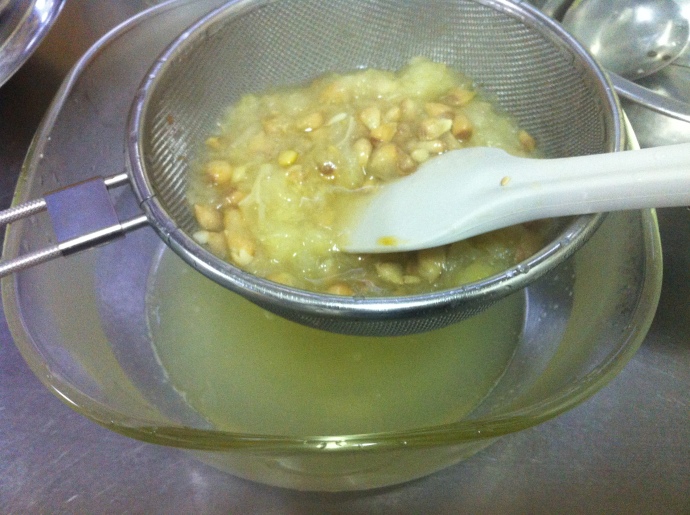
  4. While you let the yuzu peel soak, take the pot containing the yuzu pulp and seeds to the stove. Add 500mL of water to the pot. Boil the water, pulp, and seeds until water has condensed down to 2/3 of what you started with. This step is incredibly important for this recipe because this is how the natural pectin is gained. The seeds and the pulp contain large amounts of pectin, which is the ingredient that will solidify everything into a jam.
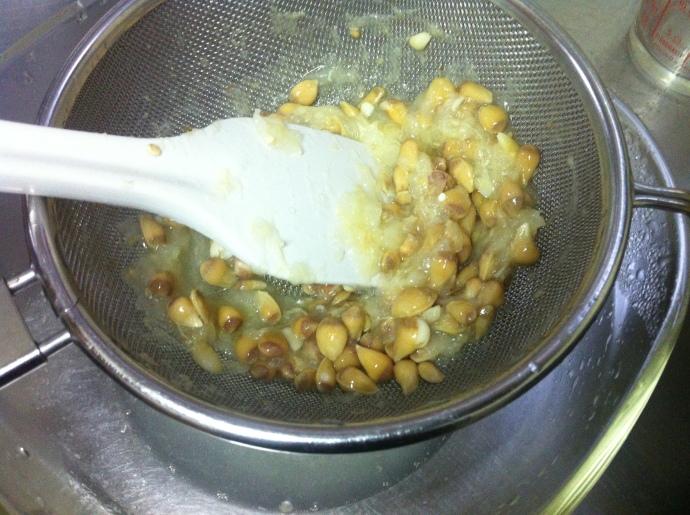
  5. After you have boiled down the pulp, turn off the heat. Place a metal strainer over a small bowl, pour pulpy mixture into strainer and, using a spatula, press the moisture out of the pulp. Slowly add the extra 300mL of pure water as you do so to ensure all pectin has been released. Press pulp into the sides of the strainer until only the toughest bits of pulp and the seeds remain. Pour liquid from bowl into a clean pot, throw out pulp and seeds.IMG_3378IMG_3380
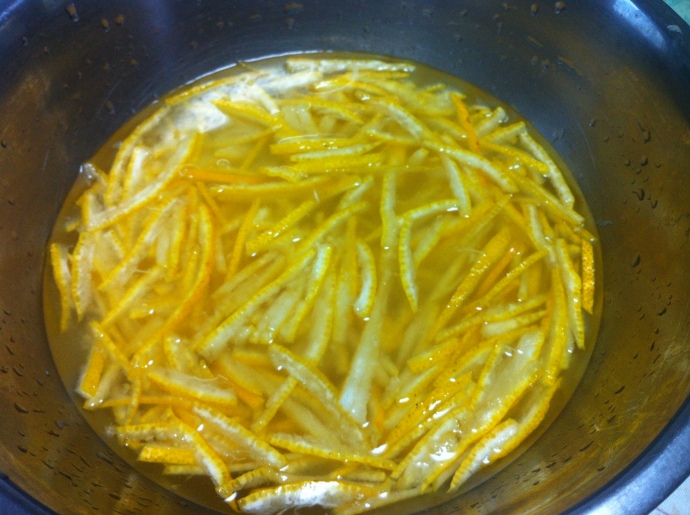
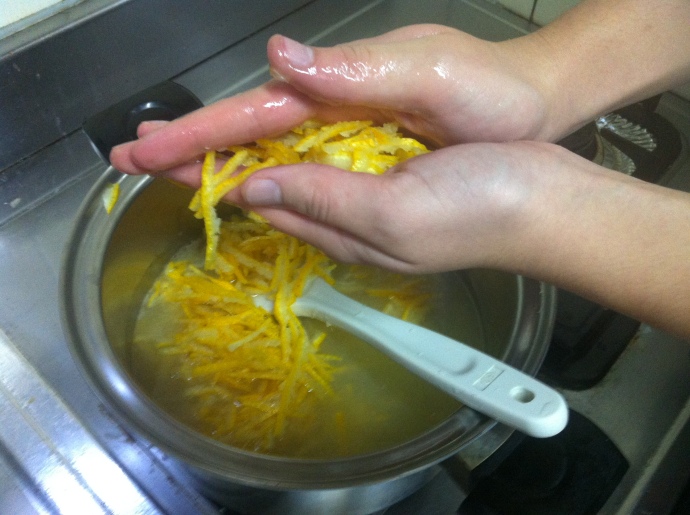
  6. Using your hands grab small handfulls of the yuzu peel out of the water. Place between the palms of your hands and press out as much water as possible. The more water you squeeze out the sweeter your jam will be. Add yuzu peel into the pot with the pectin water. IMG_3381
  7. Boil this mixture on high for 15 minutes. Be absolutely sure to stir constantly for the entire 15 minutes or it will all burn to the bottom of the pot.
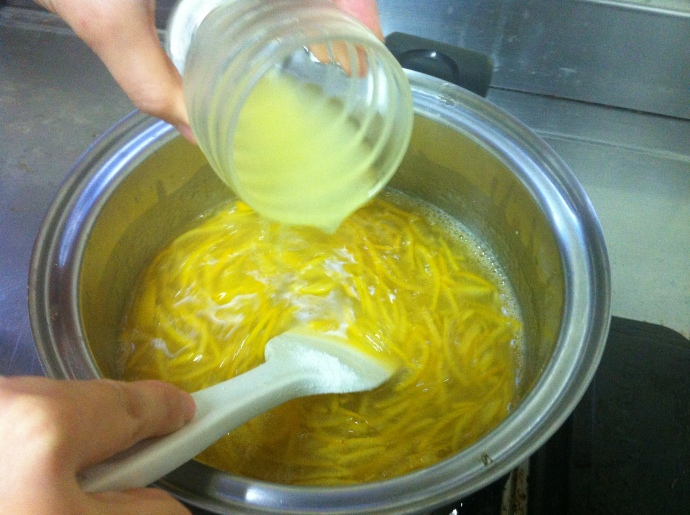
  8. After 15 minutes add sugar and yuzu juice. Continue to boil on high for 10 more minutes stir constantly. IMG_3386 IMG_3383
  9. By now a milky white substance will begin forming on the top of the bubbling jam mixture. For lack of a better word I call this “scum”.  To make beautiful, delicious jam it’s very important to remove this. I use a metal ladle and have a bowl of clean water ready of the side to dip the dirty ladle into after each scoop before skimming the ladle carefully along the top. Keep alternating between stirring jam and scumming until all scum is gone and the mixture is transparent.

    IMG_3385

    That white milky stuff in the ladle is “scum”

  10. You can tell the jam is nearing completion when the bubbles around the edges become very large and the mixture starts to get viscous.
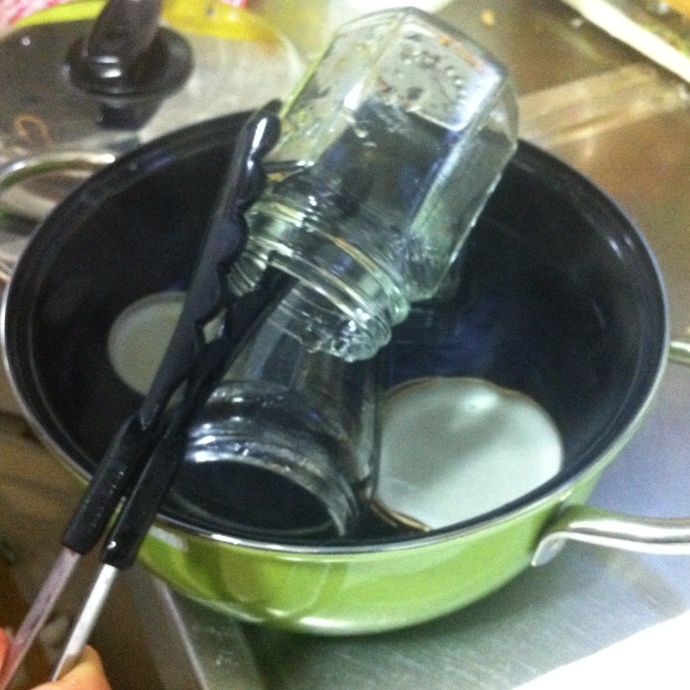
  11. In a pot of boiling water sterilize your jam jars and their lids. After, place upside down and shake as much water out as you can. While the jars are still hot you can then pour in the yuzu jam.IMG_3391 IMG_3392 photo(2)
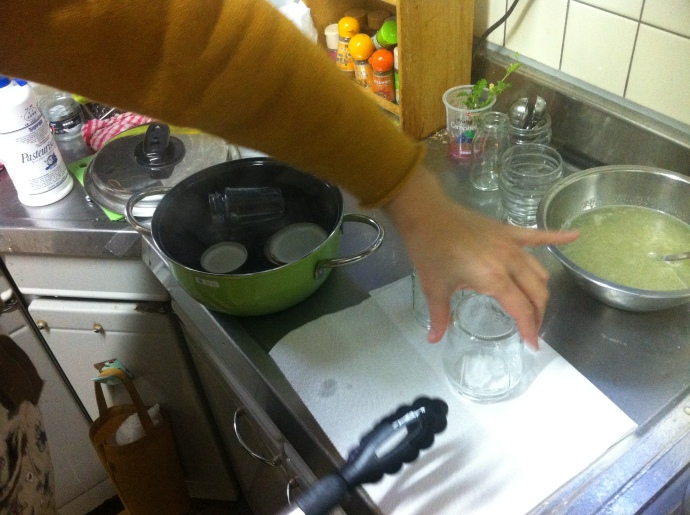
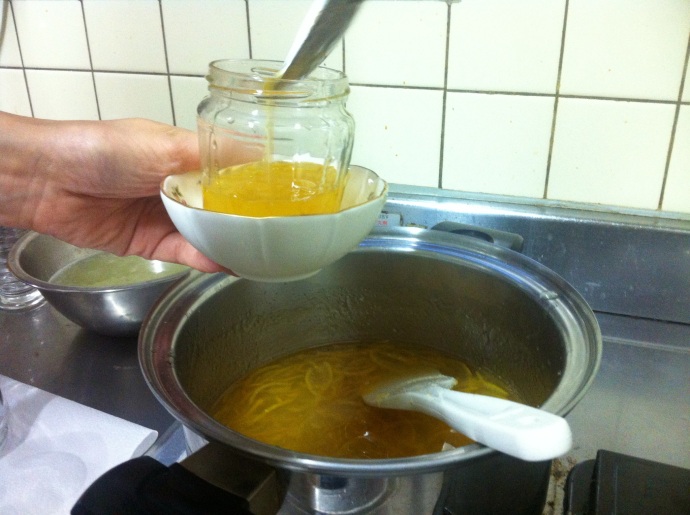
  12. Fill jars to the brim. I was able to make 2 large jars of and one baby jar of jam with this recipe. Screw the lids on nice and tight. Place in boiling water for 2 minutes.
  13. Remove from heat and decorate!
photo(2)

Merry Christmas!

And speaking of awesome homemade presents, please everyone note the gorgeous purple apron I’m wearing. It was the sweetest Christmas present from Tomomi whom I made this jam with.  I love, love, LOVE it, so you’ll probably see me wearing it a lot in the future foodie blog posts!

Categories: Dessert Recipes, Life in Japan, Sweet | Tags: , , , , , , | 1 Comment

Munch-worthy Maple Scones: For the true Canadian at heart!

I am a tea-junkie….that’s just something that I’ve come to accept about myself.

  • Do most of my friends think I’m a little nuts when they see my tea shopping splurges? Yep
Screen shot 2013-05-14 at 10.43.09 AM

Shopping spree at the Lupicia Tea festival in Kanazawa 2012

  • Do they think it’s laughable that I get cranky when I don’t get my daily tea time? Definitely.
Screen shot 2013-05-14 at 10.39.09 AM

Tea in The Tiffin Room of the Raffles Hotel in Singapore

  • Question my sanity for spending crazy sums of money to enjoy high tea at famous places? Absolutely!
tea

My mom and I enjoying high tea at The Ritz Hotel in London. I treated her for mother’s day, we know which side of the family my love of tea comes from!

  • Do people think my tea collection is insane? Yep to that question too.

    The saddest thing is that's only half of it, the other half is at school!

    The saddest thing is that’s only half of it, the other half is at school!

I’m cool with it though, when people tease me now it’s like water rolling off my back. After all, in my opinion there are definitely other things much, much worse that I could suffer an addiction for.  Tea is pretty harmless in the great scheme of things, not to mention really delicious!

I’ve always loved the quote “Tea is like a hug, but on the inside.” Drinking tea always soothes away my stress; it’s my way of putting aside a little “me-time” in my busy days and always feels like the equivalent of pampering my soul.

As many parents, especially my own, have discovered it’s easy to get children to do what you want when you dangle a tempting enough carrot. I always had my nose in a book when I was little and for my parents getting me to put my beloved books away and interact with real people was a bit of a challenge. When I was very young the reason I, not so secretly, always joined my nana for tea was for the sweets, the tea was more of an afterthought.  No one ever forced me to have tea in the garden every day….the carrot was dangled and I came quite willingly. For me I viewed it as a win-win situation; I got to hang out with my loving Nana AND I got to eat cookies! The same could not be said for my little brother who often plotted various ways to get in, get his allotment of cookies and hightail it out of there. His excuses, let me tell you, were hilarious and my nana saw through them in a heartbeat. Nevertheless though, she’d allow him to flee the table, content in the knowledge she had at least one very willing tea partner.  Maybe it’s the nostalgia of those memories and love for my Nana (who passed away very sadly when I was far too young) that brought on this tea obsession? I often reflect on those perfect tea parties with her in the garden when I drink a proper British tea.

photo (4)

But ooooh how the times have changed.  These days, I have tea time for the simple pleasure of drinking tea, and the sweet has become an afterthought.  Or it least is was, until I met Tomomi.  My passion for tea time sweets appears to have come back with a vengeance, especially my love of scones, since coming to Japan.  Scones are undeniably my favourite tea sweet of all time; preferably served warm and  topped with clotted cream and fresh jam….Now you know why I was so eager to help my friend Tomomi make over 26 various types of jam!

For Tomomi’s jam party I combined two things I’m passionate about, scones and maple syrup, into one amazing recipe. Are you chuckling over how very Canadian this was of me? It’s ok, I laugh at how incredibly Canadian I am at times too. I’ll confess it wasn’t the first time I’ve made this recipe, I made it for the first time about a year ago and loved it so much it’s been on my “must re-bake list” for far too long.

Screen shot 2013-05-14 at 10.45.18 AM

I love my maple syrup!

Screen shot 2013-05-14 at 10.45.04 AM

Om nom nom!

What I love most about these scones is that despite the maple syrup they aren’t overly sweet. The whole wheat flour and oatmeal make them relatively healthy for a scone too, while contributing to a nice crumbly consistency.

What You’ll Need:

  • 60 mL high quality maple syrup  [1/4 cup]
  • 90 mL milk [6 tbsp]
  • 130 g pastry flour [1 cup]
  • 160 g whole wheat pastry flour [1 1/4 cup]
  • 40 g rolled oats (aka: oatmeal) [1/3 cup]
  • 1/2 tsp salt
  • 1 1/2 tbsp baking powder
  • 130g butter (should be cold) [11 tbsps]
  • 1 egg

What You’ll Need To Do:

  • Heat your oven to 190°C (400°F).
  • In a large bowl mix together all dry ingredients (pastry flour, whole wheat pastry flour, rolled oats, salt, baking powder)
  • Add cold butter to dry ingredients. Using a cold knife cut the butter into the dry ingredients to mix until butter is in very, very small pieces.
  • Add milk and maple syrup to the bowl. Mix well.
  • On a baking tray lay down a piece of parchment paper (or wax paper) and press the scone dough down evenly into a large rectangle.  Continue to shape until the dough is very thin, about 3cm deep.
  • Now, using a sharp knife, cut the dough into even squares. (I cut mine into squares about the same size as my pinky finger.)
  • Rearrange the scones on the parchment paper so there is at least 5cm between each scone. This is so they have room to expand when they bake.
  • Using a fork whisk your egg in a small bowl until a little frothy.  Using a pastry brush lightly brush a little egg on the top of the scones. If you like you can also sprinkle with coarse raw sugar at this time, I personally opted not to this time to keep them a little healthier. 
  • Place the baking tray in the oven and cook scones for approximately 20 minutes, or until the top of the scones turns a light gold color.
  • Remove from oven and allow to cool at least 15 minutes before serving.

IMG_9397

Categories: Dessert Recipes, Lifestyle | Leave a comment

Citrus Cranberry Ginger Muffins

I’m pretty sure lemon + orange + cranberry + ginger = ambrosia muffins! Talk about a killer flavour combination!

When I was a little girl my mom used to make this absolutely wicked orange-cranberry loaf.  It was so delicious I don’t think it ever survived in our house for more than a day before being completely devoured. The cranberries were an explosion of flavour nestled like hidden gems in a fluffy citrus batter.  It was pretty addicting to eat to say the least and accompanied by a seductively-sweet aroma that would bring my brother and I scurrying to the kitchen in record time.

After my mom and my dad left Japan and returned home to Canada I found myself thinking about them often, and feeling more than just a little homesick.  This loaf was a taste of home that I missed, and so to welcome in spring I decided to celebrate by making muffins and modified my mom’s recipe. I had to modify it because, of course, I could never make the original recipe taste as good as hers, so I decided that I wasn’t even going to try…

What You’ll Need:

  • 2 cups all-purpose flour
  • 1 1/2 teaspoons baking powder
  • 1/2 teaspoon baking soda
  • 1/2 teaspoon salt
  • 1 1/2 tablespoon grated orange zest
  • 1 tablespoon grated lemon zest
  • 1 tbsp grated ginger
  • 1 1/2 cups fresh cranberries
  • 1/4 cup butter, softened
  • 1 cup white sugar
  • 1 egg
  • 1/2 to 3/4 cup orange juice
  • 1 tbsp fresh lemon juice

What You’ll Need To Do:

1) Preheat the oven to 175°C (350°F) . Place muffin liners inside a muffin tin (or grease muffin tin using butter lightly and then add a little flour to coat like this)
2) Whisk together flour, baking powder, baking soda, and salt.
3) Zest your orange, lemon and ginger.  Add to dry mixture. Set aside.
4) In a large bowl, cream butter.  When butter looks light and fluffy add sugar and mix together.
5) Add egg to the butter&sugar mixture and mix until smooth. Stir in orange juice and fresh lemon juice.
6) Pour liquid mixture into dry ingredients. Mix together until just moistened.

IMG_91297) Add in whole cranberries. Fold batter over them gently.
IMG_9143
8) Pour into prepared muffin tray until about 3/4 full. Bake for 20-30 minutes until an inserted toothpick can be removed cleanly.
IMG_9149
I personally prefer mine a little crunchy on the outside so I tend to let them brown up quite a bit before taking them out. 
IMG_9146
9) Let the muffins stand for at least 10 minutes before turning them out onto a wire rack to cool.
I ended up giving the majority of this batch (I think it made about 18 generous-sized muffins) away to two very good friends of mine celebrating their birthdays this weekend.  I have of course have finished the left-overs far too quickly and I think these muffins were so delicious they might have to be made again soon…very soon…possibly as early as this upcoming long weekend!
Categories: Dessert Recipes | Tags: , , , , , , | Leave a comment

Topsy-Turvy Toffee Apple Gingerbread Cake

Boy is that a tongue-twister of a name or what!  I chose it however, because this dessert is sure to twist that tongue of yours up in knots of delight.  Not to mention it’s so good it’ll turn your world upside down.

Imagine a rich toffee sauce seeping down over velvety-soft baked apple slices into the waiting dense, moist and intoxicatingly-spiced gingerbread cake below…. Drooling yet? If not, then you’re made of stronger stuff than me. I’m the one trying to entice you to try baking this and instead I am only melting over my own keyboard with desire to eat this cake again!

I am genuinely excited to make this cake again for Christmas dinner next year and knock the socks off my family. Gingerbread always makes me think of Christmas at my grandmother’s house.  Her gingerbread cookies were the king of the castle now and forever for me and those Starbucks ginger cookies, yeah they are good but, only dirty rascals in comparison. Thus my family adores gingerbread so I know this recipe will be very, veeery well received. For my family, next time I try this recipe I’m going to add more spice to give the gingerbread cake a little more *oomph* but that’s only because I like gingerbread incredibly gingery and spiced.

This recipe as it stands however, is a guaranteed crowd-pleaser.

What you’ll need for the TOPPING:

  • Wax paper cut into a circle
  • 4 tablespoons of butter
  • 1/2 cup dark brown sugar
  • pinch os salt
  • 2 apples – peeled and sliced into 1/8-to-1/4- inches wedges. (Thinner is better for overlapping layering)

What you’ll need for the CAKE:

  • 1/2 cup butter, softened to be room temperature.
  • 1/2 cup sugar (I personally used golden sugar)
  • 1 large egg
  • 1 cup butter milk (I used 1 cup milk + 1 tbsp lemon juice which I allowed to sit for 5 minutes)
  • 1/3 cup honey
  • 1/3 cup molasses
  • 2 1/4 cups all-purpose flour
  • 1 teaspoon baking soda
  • 1/2 teaspoon salt
  • 1 1/2 teaspoon ground ginger
  • 1 1/2 teaspoon cinnamon

What you’ll need to do to make the TOPPING:

  1. Preheat oven to 170°C. 
  2. Cut a piece of wax paper in a circle the same size as your cake pan (I used a round glass one).  Place in the bottom.  This will ensure you don’t “loose” any apples when you flip the cake upside down onto a plate at the end.
  3. Melt butter in a small saucepan over a medium heat.  Dump in brown sugar begin mixing. Simmer for about 4 minutes and then add in salt.
  4. Remove from heat and pour into the bottom of your cake pan.
  5. Arrange apples decoratively overlapping one another in a circle on top of the toffee. Try not to leave any gaps.

What you’ll need to do to make the CAKE:

  1. In a large bowl blend together butter and sugar until light and fluffy.
  2. In a medium bowl whisk together wet ingredients: the egg, molasses, honey and butter milk.
  3. In a different bowl sift together the dry ingredients: flour, baking soda, salt, ginger and cinnamon.
  4. Slowly add a bit of the wet ingredients to the butter mixture, mix well and then add a bit of the dry mixture, mix well.  Repeat until all wet and dry mixtures have been added.
  5. Very gently pour the batter over the apples in the cake pan.
  6. Bake for about 45-50 minutes or until a toothpick inserted in can be removed cleanly.
  7. Remove from over and allow to cool for 15 minutes.
  8. After cooling, cut around the edges of the cake to allow the cake to transfer nicely onto a serving plate.
  9. Place your desired serving plate, face down on top of the cake pan. Flip the cake quickly and place the serving plate down on a hard surface.  If the cake doesn’t immediately plop out (mine did it was a piece of cake, haha I’m so punny) try gently tapping the bottom of the cake pan.
  10. Be sure to allow guests to ooh-ahh and compliment you on your superb looking dessert before cutting up and serving.

I recommend serving hot with a dollop whip cream or vanilla ice cream (whichever tickles your fancy) and a pipping hot cup of apple cider.

IMG_2147

IMG_2150

IMG_2151

Guilty as charged. I definitely didn’t put just a “dollop” of ice cream on mine. That probably should have been kept a secret!

Categories: Dessert Recipes | Tags: , , , | Leave a comment

Comforting Chai-spiced Rice Pudding

For those of you who don’t know me, know this: I adore to the bottom of my very being chai spiced things. There is something that I find impossible to resist about the alluring combination of cardamon, cinnamon, clove wafting in the air.  It should be no surprise knowing this fact, that I fell head-over-heels-in-love with this recipe before I even tasted it. After making it, it’s now dangerously delicious to me and I want to make it at every opportunity.  It’s a perfect dessert for a cold winter’s day!

What you will need:

  • 5 cups whole milk *
  • 1 cup arborio rice
  • 2/3 cup sugar
  • 1/4 teaspoon salt
  • 1/4 cup finely chopped crystallized ginger (about 1 1/2 ounces)*
  • 3/4 teaspoon ground cinnamon
  • 1/2 teaspoon ground cardamom
  • 1/2 teaspoon ground allspice

*I’ve tried using partially skimmed milk with equal success if you fancy a “skinny-version” of this recipe.

*If like me you don’t keep crystallized ginger (living in Japan, yeeeeah, definitely not easy to lay your hands on…) I found that about 1/2-to-3/4 teaspoon of powdered ginger to taste works just fine too.

What you’ll need to do: 
  1. In a large saucepan stir together milk, rice, sugar and salt over a medium-high heat until the sugar dissolves and the mixture begins to boil.
  2. Reduce the heat to medium-low.  Now you should  gently simmer, leaving the saucepan uncovered, until pudding is thick and rice is tender. Do not leave this saucepan unwatched, it will need frequent stirring or the rice might burn to the bottom of the pot, and heavens knows we don’t want that! This process will take approximately 45 minutes. (I like to make this recipe while I’m already in the kitchen preparing another dish or cleaning.)
  3. Once the mixture is lovely and thick, mix in ginger and spices. Remove from heat.
  4. Spoon warm pudding into bowls; garnish with fresh apple slices, a cinnamon stick and a sprinkle of cinnamon (if desired) and serve.

Chai rice pudding

Categories: Dessert Recipes | Tags: , , | 1 Comment

Create a free website or blog at WordPress.com.